
Go-Live Handbook
for
Malibu & Beyond Malibu
HOW TO USE THIS HANDBOOK
This handbook has been put together to help camp staff and supervisors at Malibu and Beyond Malibu navigate their first 90 days in Workday! This site will provide you with some reminders on what to do on your first working day in July, resources, and reminders for your first 90 days.
On your first working day in July, please be sure to:

Log into Workday using your Staff Resources username and password.
Verify your personal information
Verify your banking information
Set up your email notification
Request any post-July 1 absences
Submit an expense report & outstanding invoices
Begin tracking your time in Workday (hourly employees only).
Additionally, if you are a supervisor be sure to:
Need help? Click each task for resources or keep scrollin’ for more information!
BEFORE WE GET STARTED
Different features of Workday are available to different “payroll” groups. At Beyond Malibu and Malibu there are staff that are part of the US payroll group and staff that are part of the Canadian payroll group. Below is a list of features available to each group. For supervisors, the features available depend on the payroll group of the employee.
US PAYROLL EMPLOYEES
CANADIAN PAYROLL EMPLOYEES
EXPENSES & INVOICES
EXPENSES & INVOICES
HOURLY TIME ENTRY & ABSENCE

If you are a supervisor, and on Canadian payroll, you will be able to approve hourly time entry and absence requests for US payroll employees.
LOGGING IN
Ready or not, it is time to log into Workday! Click the button to access the Go-Live Version of Workday. You will be prompted to log in with your Staff Resources username and password.

Don’t forget these things as you log in!

If you cannot remember your staff resources username and password, call the Connections Team! Your Admin Manager, supervisor, or Camping Services cannot reset your password.
Go ahead and bookmark the Go-Live Version of Workday in your favorite browser on your computer. You are gonna be in Workday a lot!
Forget about the training version of Workday you may have logged into before summer! From now on, only use the version linked above!

Remember, the mobile app is optional but is also handy!
CAN’T REMEMBER YOUR LOG IN?

719-381-1844

helpdesk@sc.younglife.org
NAVIGATING WORKDAY
Now that you are logged into Workday, here are some tip and tricks to navigate the tool!
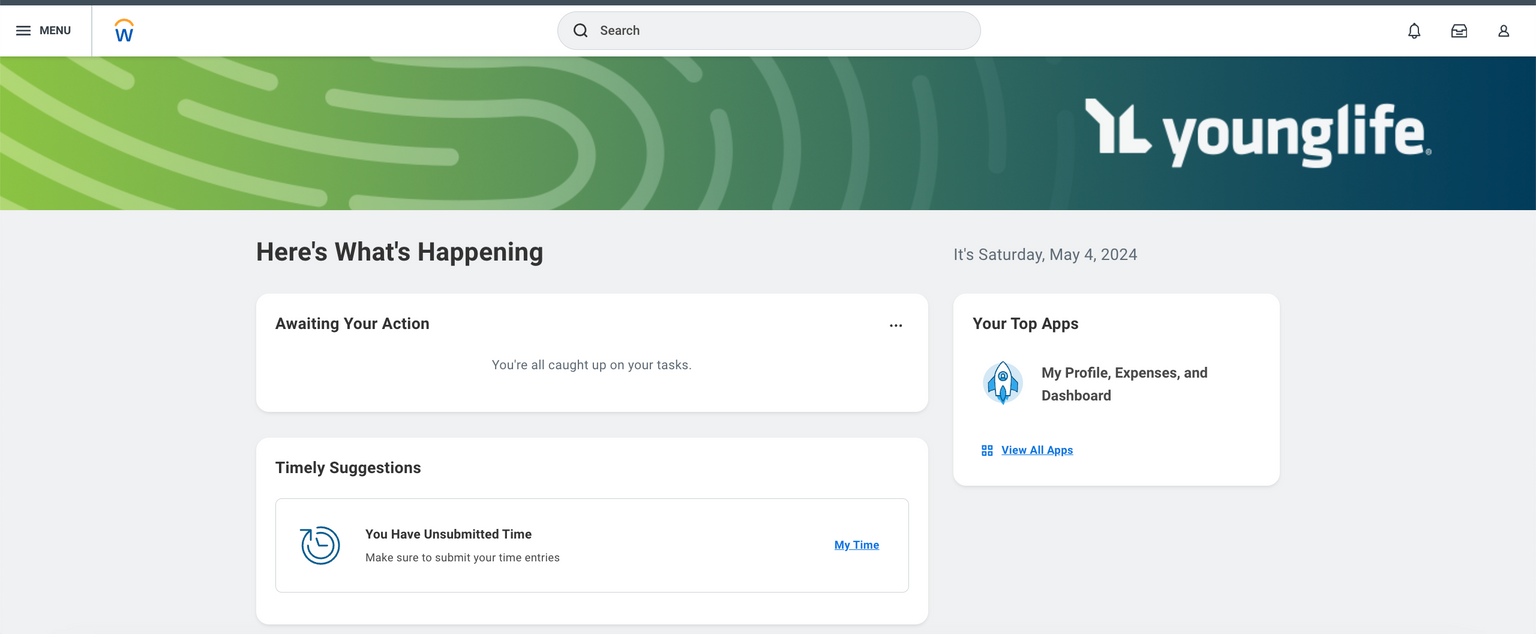
Your home screen in Workday is unique to you! It depends on if you are an hourly employee, a salaried employee, a supervisor, or an admin manager.
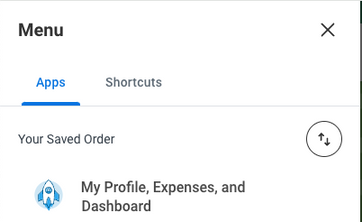
Click on the “Menu” icon to see all of your apps and any saved shortcuts. Clicking on the Workday logo will always bring you back to the home screen.


The bell icon will show you notifications that are letting you know that a business process has been completed or reminders. The paper tray icon will show notifications that require your attention or action! The person icon will all you to view your Workday profile and account settings.

If you are unsure where to find something in Workday, you can use the search bar! You can type in a few words and hit enter and Workday will bring you back any associated tasks you may be looking for.
All employees have access to the “My Profile, Expenses and Dashboard”. This Dashboard will help you navigate all of the essential functions of Workday. You can access it from the “My Top Apps” section or the Menu.
All supervisors have access to the “My Team Management” dashboard. This Dashboard will help you navigate all of the tools in Workday to supervise your team. You can access it from the “My Top Apps” section or the Menu.

The “Awaiting Your Action” section summarizes any items that need you immediate attention. These items also show up as notification on your paper tray inbox in the upper right hand corner.
VERIFYING YOUR PERSONAL INFORMATION
Now that you are logged into Workday, let’s verify your personal information—just this once! Everything should be good to go, but let’s double-check just to make sure.

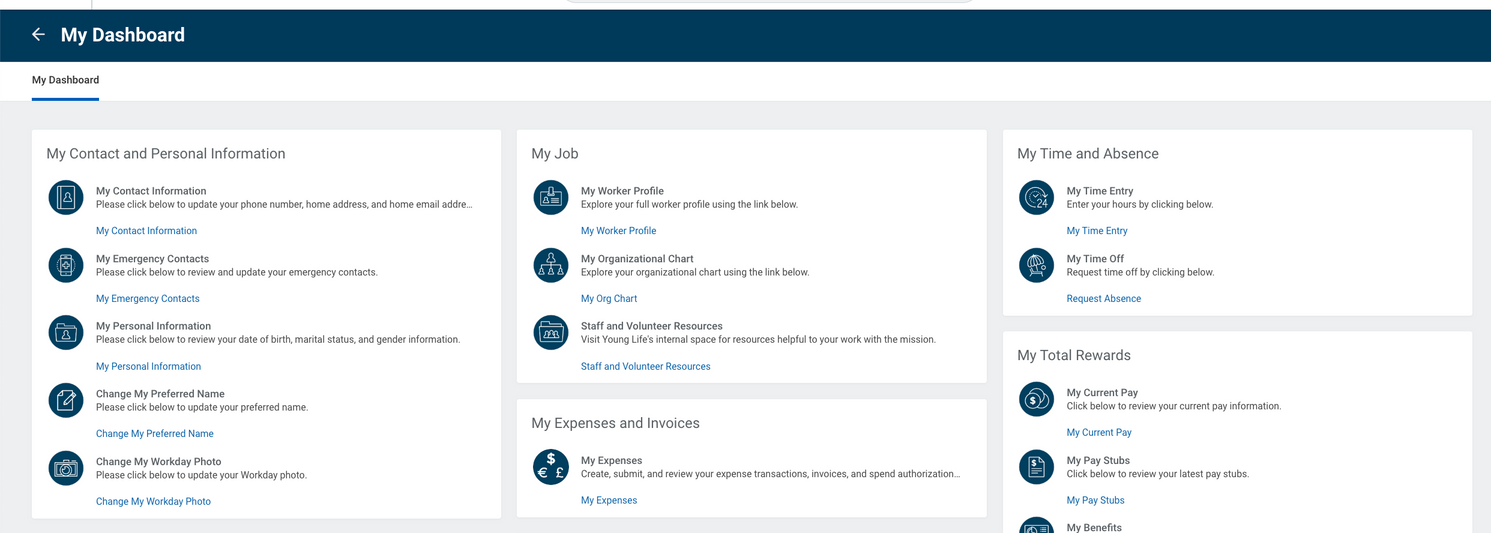
- Click on the “My Profile & Expenses Dashboard” from either the home screen or the Menu.
- Under “My Contact and Personal Information,” click the light blue hyperlinks under each section to view what is currently listed and to make edits.
- When editing your preferred name, uncheck the “Use Legal Name as Preferred Name” box. Remember - your Admin Manager will have to approve your preferred name!


Need help?
VERIFYING YOUR BANK INFORMATION
Next, let’s verify your bank information! If you are an hourly employee, verify your bank information before July 3.
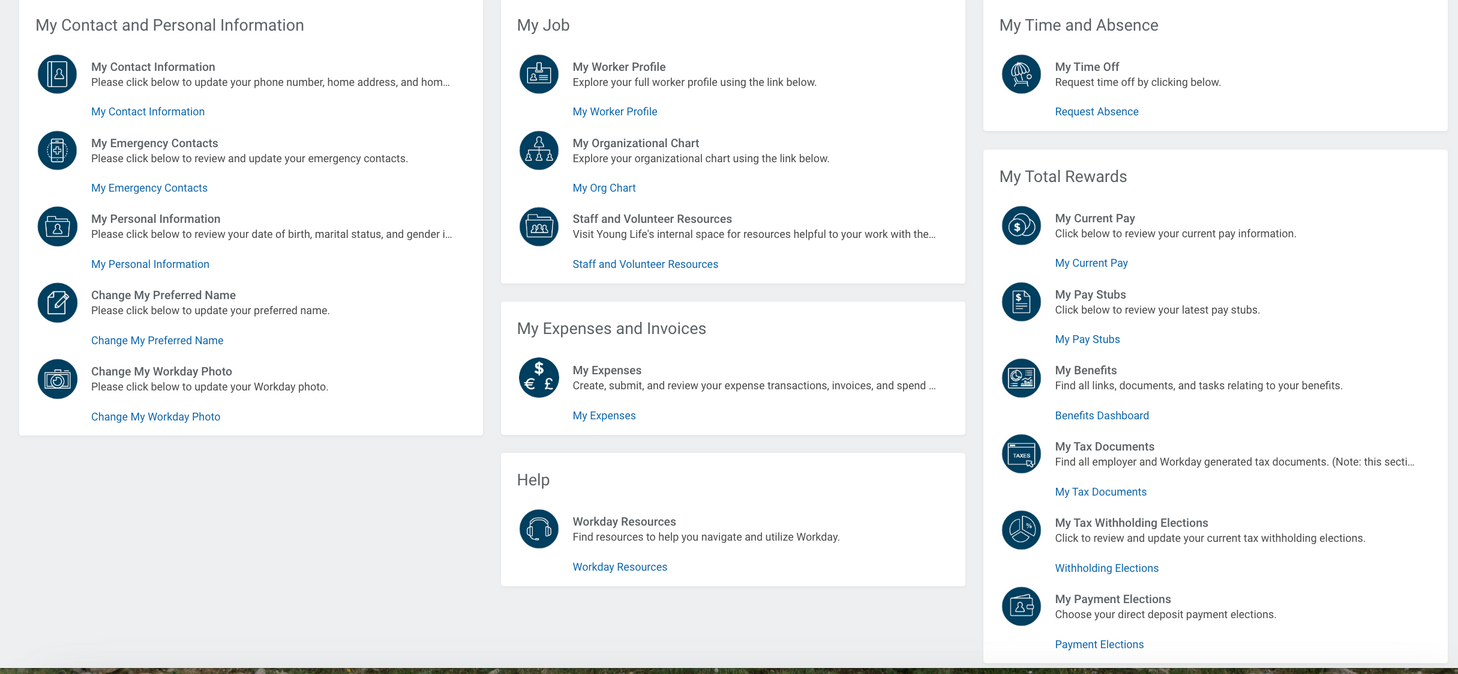
- Click on the “My Profile & Expenses Dashboard” from either the home screen or the Menu.
- Click the hyperlinks under “My Tax Withholding Elections” and “My Payment Elections” sections to view what is currently listed and make any edits.
Don’t forget these important terms!
- Pay Slip - formerly known as a pay stub. A summary of your paycheck.
- Payment Election - formerly known as a direct deposit. This is a summary of where your paycheck is deposited.
Need help?
SETTING UP NOTIFICATIONS
Alright, now that your information is correct, it is time to set up your email and mobile app notifications!
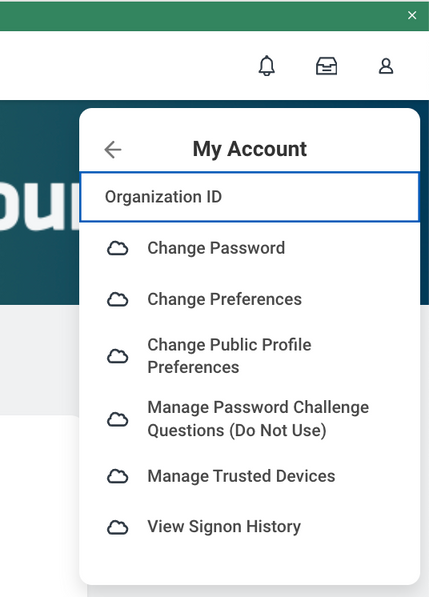
- From the home screen, click on the profile (person) icon.
- Select “Change Preferences”.
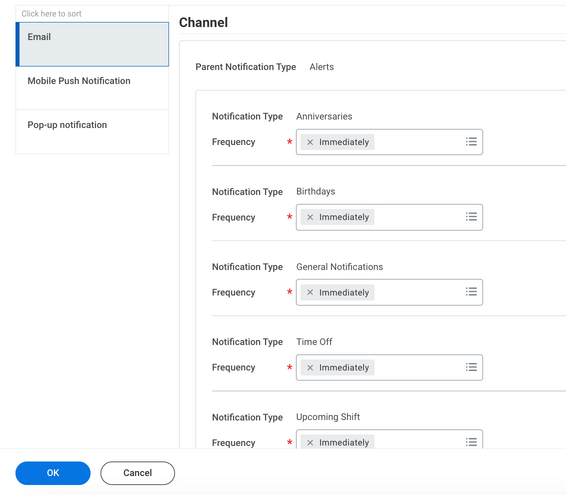
- Scroll to the notifications settings and adjust email and mobile app notification as needed.
Remember, “Immediately” means you will get a notification as soon as something requires your action. “Daily” means you will get a daily summary email when needed.
If you have a Young Life email address, you cannot change your email address in Workday.

Need help?
REQUESTING AN ABSENCE (US PAYROLL STAFF ONLY)
Now, it is time to request any post-July 1 absences in Workday. Remember, moving forward all staff must request all absences through Workday. This is especially important for hourly employees.
- Click on the “My Profile & Expenses Dashboard” from either the home screen or the Menu.
- Click the hyperlink under “My Time Off”.
- Once on the absence calendar, select the specific dates to request and then click “Request Absence”.
When requesting an absence, don’t forget:
- You should only select the dates that should be counted as an absence. You SHOULD NOT include regularly scheduled days off or holidays in your request.
- You will need to select the type of absence request. Remember, “vacation” does not have to mean you are on a tropical island, it just means you are away from work!
Don’t forget these important terms!
- Absence - In Workday, this includes both PTO and any type of leave (i.e. maternity, paternity etc). In Workday, you will request an absence and then specify that it is PTO.
Need help?
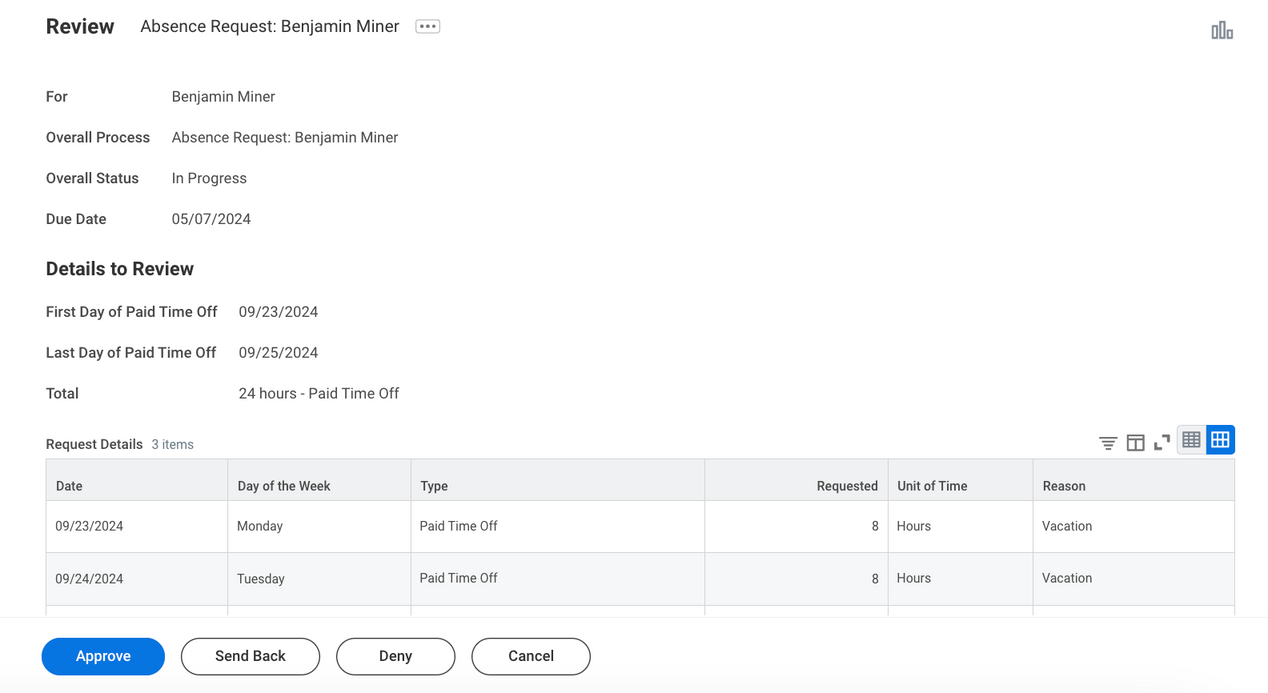
APPROVING ABSENCE REQUESTS
As your team requests all post-July 1 absences in Workday, you need to approve the requests in Workday, even if you have already approved it via email or verbally! This is especially important for hourly employees.
Supervisors can approve absences from three places:
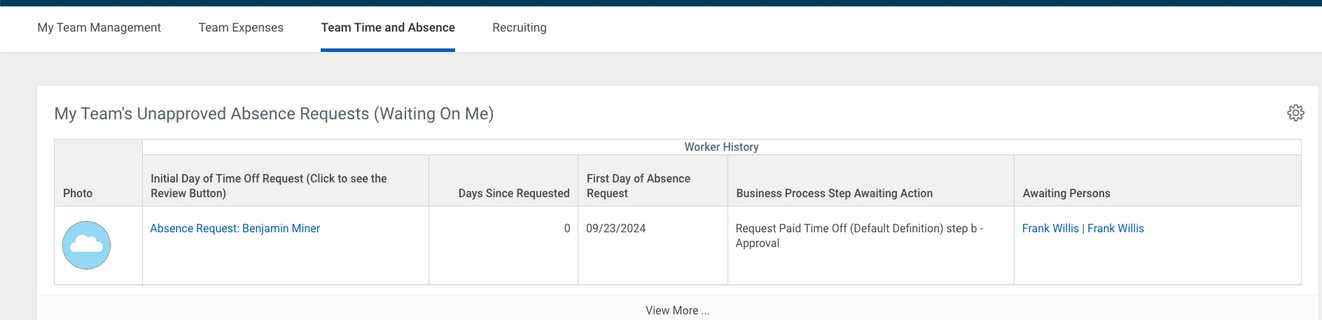
- The “Awaiting Actions” section on the home screen.
- The “My Tasks” inbox.
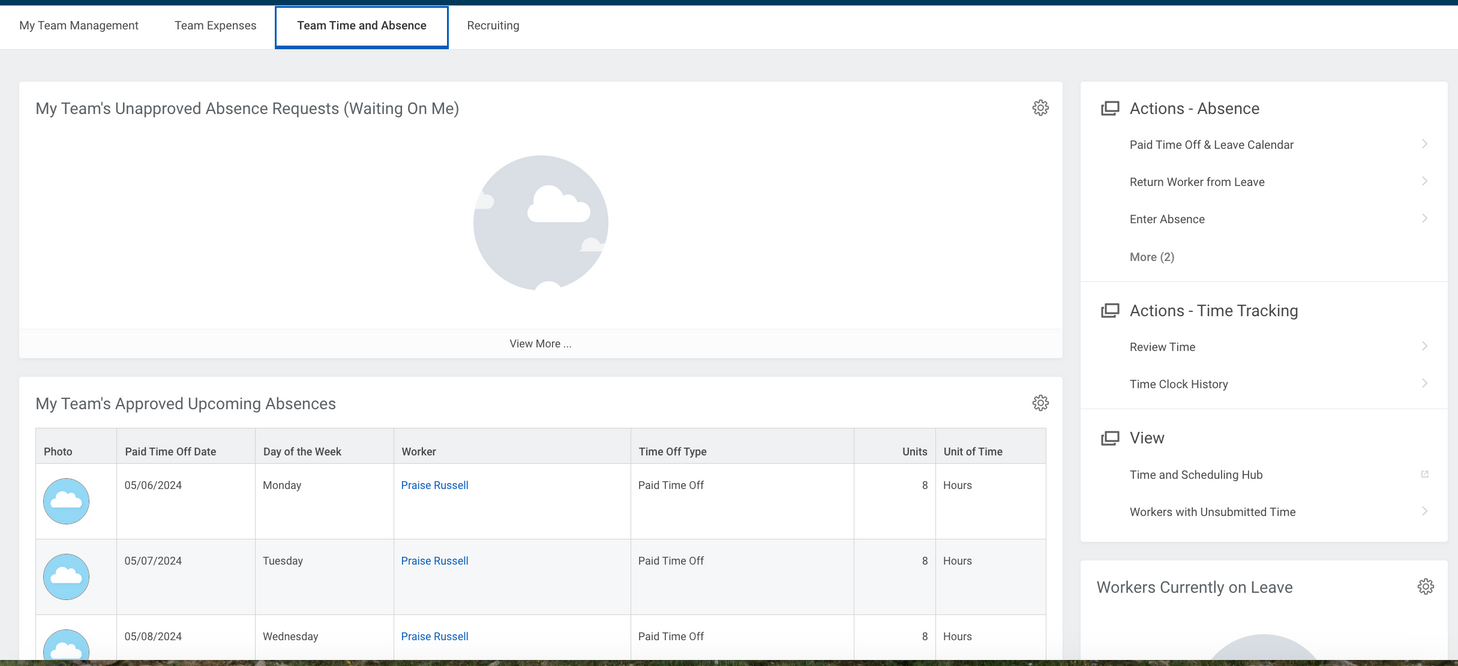
- The “My Team Management” Dashboard under the “Time an Absence” tab. Click on the blue hyperlink to view more information about the request and to approve it.
To view all absences for your team, both approved and pending:
Remember, as you continue to use Workday, you will be able to see your team’s previous absence requests. However, all previous PTO taken before July 1 2024 will not be listed in Workday.
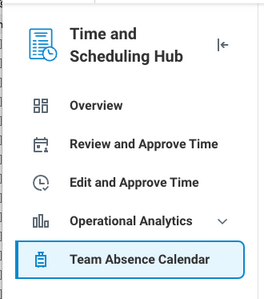
- Click on the “My Team Management” dashboard.
- Under the “Team Time and Absence” tab, click on the “Time and Scheduling Hub” from the right-hand menu. Then select, “Team Absence Calendar.”
- Select all employees you would like to view.
- You can view by week, month of year by using the drop down menu on the right-hand side of the screen.


Need help?
CREATING AN EXPENSE REPORT
When you log into Workday, you will have access to all of your expenses for the month of June!
In Workday, there will no longer be a penalty for submitting more than one monthly expense report. So for your first working day in July, create an expense report with just a few expenses to get used to it. Then in a few days, submit another report! When you go to create a report, don’t forget these important terms:
YL Section
Young Life is broken up into five sections in Workday. Your section will automatically default to camping
Cost Center
Formerly known as a mission unit or department. In Workday, instead of the “Food Service Department” it is now the “Food Service Cost Center”.
Company
Country that you are operating in. CPY1016-YL is Malibu Club Ministry Affiliates and CPY1014 is Malibu Club Yacht Charters LTD
Cost Center Manager
The person who holds fiscal responsibility for the cost center. At camps, this is most likely a Department Head or the Camp Manager.
Memo
Formerly known as business purpose. Why do you spend the money?
Expense Line
Used to indicate the “type” of transaction (i.e. out-of-pocket, mileage or p-card).
Spend Category
Formerly known as accounts.
Remember, in Workday, Camping has consolidated several departments! Below are the new cost center names, IDs, and departments that are included in each cost center.
Cost Center Name |
Facility Management |
Food Service |
Retail |
Guest Services |
Housekeeping |
Landscape |
Administration |
Capital Projects |
ID |
XX01 |
XX02 |
XX03 |
XX04 |
XX08 |
XX10 |
XX50 |
XX75 |
Department(s) |
Maintenance, Transportation |
Food Service |
Store, Concessions |
Program, Special Program, Out-of-Camp Program, Ranching |
Housekeeping |
Landscape |
G&A, Non-Departmental |
Capital Assets/CIP, Development, Major Maintenance Savings |
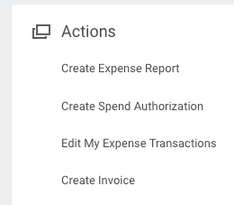
To create an expense report:
- From the My Profile & Expenses Dashboard, click on the “My Expenses” hyperlink under the “My Expenses and Invoice Section”. Then select “Create Expense Report”.
- Create a new expense report; in the memo section, name your report.
- In the company line enter either “CPY1016-YL Malibu Club Ministry Affiliates” or “CPY1014 - Malibu Club Yacht Charters LTD” depending on where you work. Staff at Malibu and Malibu Yatchs will never choose “CPY0001 Young Life Incorporated” for expense reports.
- Select the transactions to include in the report.
- For each expense: select the spend category, enter the memo, and change the cost center if needed.
- Drag and drop a receipt for all transactions.


You can only have one company per expense report. If you have an expenses for Yachts, those should be in a separate expense report from the expense for Malibu or Beyond.
For all Canadian purchases, employees must itemize GST taxes:
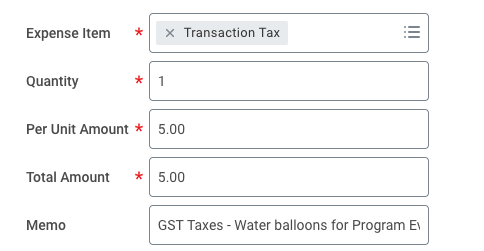
- Click the “Add” button under the itemization section.
- For the first itemization, edit the total amount to reflect the expense total minus the GST taxes.
- Click “Add” and select “Transaction Tax” as the expense item and list the total amount of GST taxes. Then re-enter the memo.
Previously, when itemizing GST taxes, all taxes were allocated to the admin department. in Workday, please ensure that the taxes are allocated to the same cost center as the expense. Taxes should “follow” the expense.

Remember, expense reports over $1000 will be routed to all associated cost center managers. They will be able to see all expense in the report and all associated cost center managers will have to approve the report. All expense reports less than $1000 will go directly to your camp bookkeeper.
Need help?
APPROVING AN EXPENSE REPORT
Remember, expense reports will be routed to the associated cost center managers. This means, you will be asked to approve reports for people not on your team. This also means that if someone on your team does not spend money in your cost center, you will not have to approve their report.
You can approve expense reports from the “Awaiting Action” section on the home screen or in the “My Tasks” inbox. From the expense report screen you can:
- View a summary of the expense report.
- View a summary of each transaction.
- View if a transaction is itemized or allocated to a single cost center.
- Click on any expense to view more information, including the receipt.
- Approve the expense report or send it back to the employee for correction.


If you send back an expense report, don’t forget to include a comment! This is required!


The Camp Manager’s expense report will also be sent to the Camping Divisional Coordinator for approval. However, if the Camp Manager allocated expenses to cost centers at camp, those cost center managers will need to approve the report as well. For example, the Admin Manager is the cost center manager of the administration cost center, which is typically where Camp Manager expenses are budgeted (i.e. travel). This means the Admin Manager will need to approve the Camp Manager’s expense report in addition to the Camping Divisional Coordinator if expenses are allocated to the administration cost center.
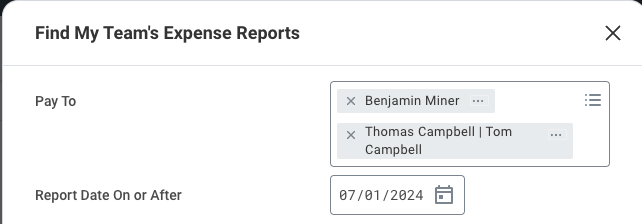
To view your team’s previous expense reports:
- Click on the “My Team Management” dashboard and select the “Team Expenses” tab. Then select “My Team’s Expense Reports”.
- In the Pay To Field, select the employee whose reports you would like to view. You can select multiple employees. Select the needed filters.
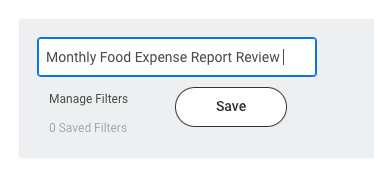
- You can save the filter if you plan on using it again!
Need help?
SUBMITTING AN INVOICE
Let’s submit any outstanding invoices that you need to pay! As you are creating an invoice, don’t forget the important terms below. They are listed in the same order you will be asked for them on your invoice request!
Supplier
Remit-To Connection
Formerly known as vendors.
If a vendor has multiple locations set up, you can select one to send the check to.
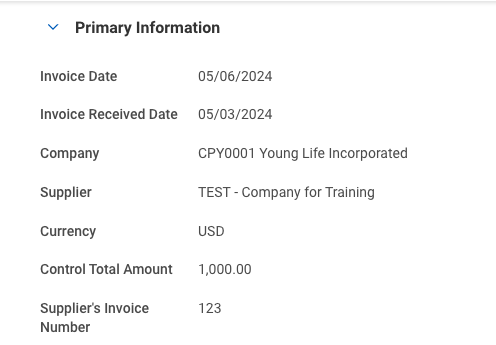
Control Total Amount
The total amount listed on the invoice
Memo
Formerly known as business purpose. Why did you spend the money?
Item Description
Same as memo. Why did you spend the money?
Spend Category
Formerly known as accounts.
Extended Amount
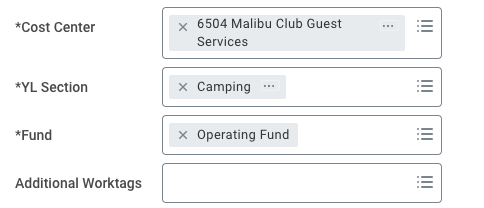
Cost Center
Fund
Same as control total amount. The total amount listed on the invoice
Formerly known as a mission unit or department. In Workday, instead of the “Food Service Department” it is now the “Food Service Cost Center”.
There are several funds available in Workday. This will default based on the cost-center selected. Camping will most often use “operating”.
To submit an invoice for payment:
- From the My Profile & Expenses Dashboard, click on the “My Expenses” hyperlink under the “My Expenses and Invoice Section”. Then select “Create Invoice”.
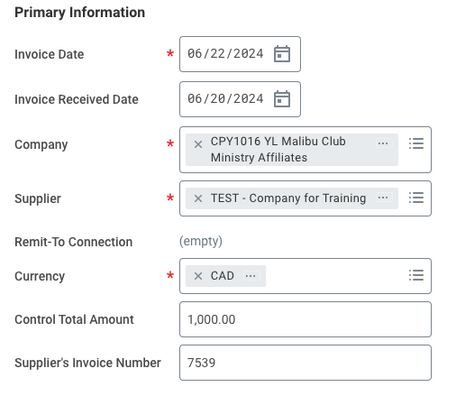
- Fill out all fields under the “Primary Information” section.
- When selecting a company, for US vendors select CPY0001. For Canadian vendors, select either CPY1016 or CPY1014, depending on which company the invoice is for.
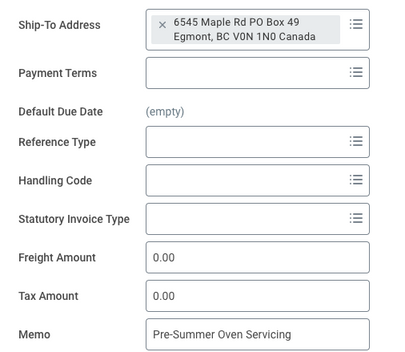
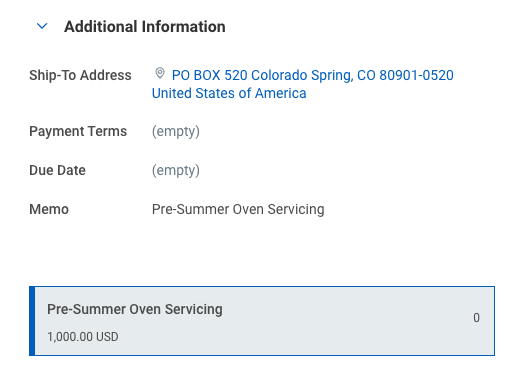
- In the “Additional Information” section, all fields between the “Ship-to Address” and “Tax Amount” will default based on the company and supplier.
- Do not list the GST taxes in the “Tax Amount” field.
- Make sure to re-enter the memo in the “Additional Fields” section.
- Scroll down and select the “Attachments” tab to upload the invoice.
.


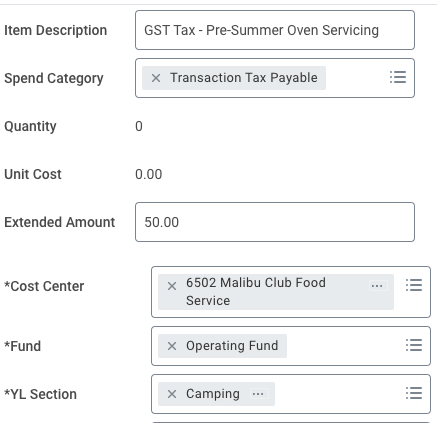
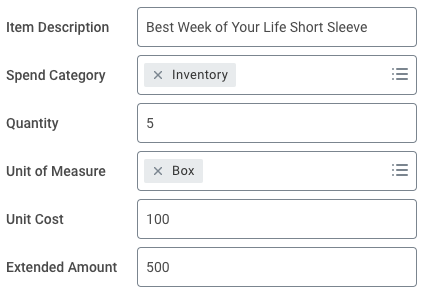
Then fill out the following fields:
- Skip the line titled “Item” and re-enter the memo in the “Item Description” line.
- Select the spend category, and re-enter the total amount listed on the invoice under “Extended Amount.”
- Skip ministry type. Unless the invoice is for Spend Authorization, skip “Projects” and “Additional Worktags”.
.
If the vendor is a US vendor, click “submit” to send the invoice to the cost center manager. If the vendor is a Canadian vendor, following the steps below to itemize GST tax:
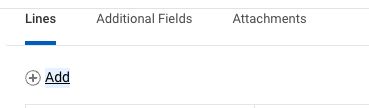
- In the “Lines” section click “Add”
- Re-enter the memo in the “Item Description Line” and select “Transaction Tax payable as the spend category.
- Enter the GST tax amount in the “Extended Amount” field.
- Fill out all remaining field and click “Submit”.
.
Need help?
If you itemize out GST tax, be sure that you have adjusted the extended amount of each itemization to equal the control total amount.
When submitting an invoice for payment, don’t forget:
- Any supplier you have paid in the last two years in Concur will be in Workday. If you need a request a new supplier, see the “Supplier Request” user guide.
- Since invoices are not connected to your p-card, you have to fill out more information! Some of the required fields do not have astericks, so be sure to refer to a user-guide or video if you are unsure if a field is required.
- All invoice requests, regardless of amount, require an attachment.
- Click the “Add” button under “Lines” tab to itemize an invoice.
- You need to select either a “Goods Line” or “Service Line”. The goods line will let you break out the quanity and unit cost for the invoice. The Service Line does not.

Remember you still need to have a W9 for all suppliers. Accounts Payable will set up the supplier within 24-48 hours of receiving the request.
APPROVING AN INVOICE
Invoices will be routed to the associated cost center manager for approval.
You can access an invoice from your “My Tasks” inbox or “Awaiting Action” section on the home screen. From the invoice summary screen:
- You can view all supplier information.
- Click on the Invoice Memo to view information regarding which spend category and cost center were used.
- Click on any attachments to view the associated invoice.

Need help?
ENTERING TIME (HOURLY EMPLOYEES ON US PAYROLL ONLY)
Alright, let’s start tracking your time in Workday!
- Under the “Timely Suggestions” section on the home screen, click on the “My Time” Hyperlink. Or click on the “My Profile & Expenses Dashboard” from either the home screen or the menu. Under the “My Time and Absence” section, click the hyperlink titled “My Time Entry”
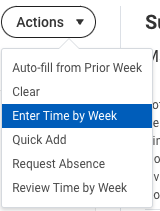
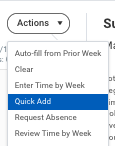
- On your time card, you can double-click the date to enter hours, or click on the “Actions” button to enter time by week or using the quick add feature.
- At the end of the pay period, click the “Review” button in the bottom right hand corner. Enter any comments, and then click “Submit”.
Remember, pay dates, pay periods and overtime rules have not changed! Your overtime rules are based on the location of your camp.
WHEN ENTERING YOUR TIME, DON’T FORGET THESE THINGS
- There is not a clock-in/clock-out feature for hourly employees. You can enter time as frequently as you would like (i.e. daily, weekly, or adding everything at the end of the pay period).
- You are encouraged to be as specific as you would like when entering their hours! See the conversion chart below to enter minutes as decimal points.
- Be sure the request all absences through Workday so that they should up on your timecard!
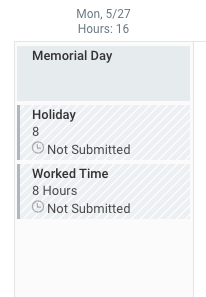
- If you work Young Life holiday, you get paid for 8 hours of holiday pay as well as their time worked.
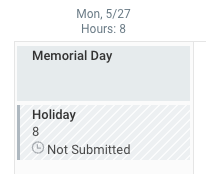
- If a Young Life holiday falls on your regularly scheduled day off, you still get paid 8 hours of holiday time.
Need help?
APPROVING HOURLY TIME ENTRY
Hourly employee time cards are due to supervisors by 11:59 PM MST on the last day of the pay period. Supervisors must approve time cards by noon local time the day after the pay period ends.
Pay Period | Employee Due Date By 11:59 PM local time | Supervisor Due Date By Noon MST |
July 1 - July 15 | Monday, July 15 | Tuesday, July 16 |
July 16 - July 31 | Wednesday, July 31 | Thursday, August 1 |
August 1 - August 15 | Thursday, August 15 | Friday, August 16 |
August 15 - August 31 | Saturday, August 31 | Monday, September 2 |
September 1 - September 15 | Sunday, September 15 | Monday, September 16 |
September 15 - September 30 | Monday, September 30 | Monday, October 1 |
You can approve time cards in two ways: from their “My Tasks” inbox or from the “My Team Management” dashboard.
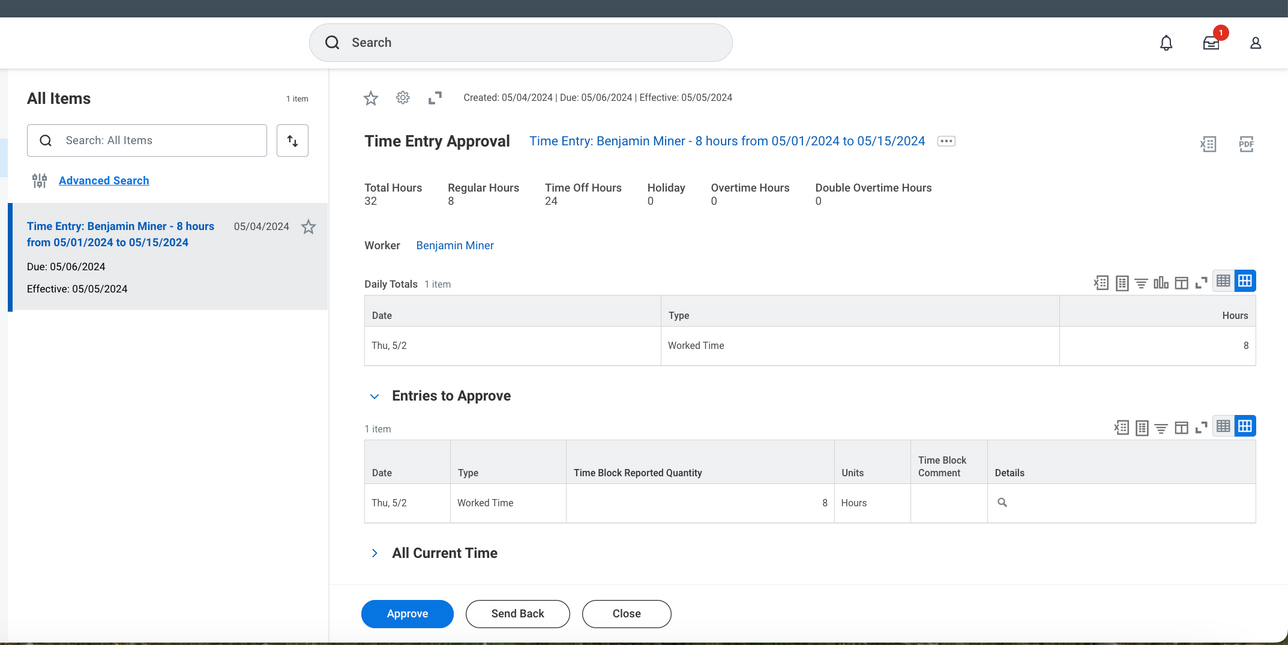
To approve from the “My Tasks” inbox click on the paper tray icon or the task under the “Awaiting your Action” section on the home screen. You can then view:
- A summary of hours.
- Daily totals.
- Any comments left by the employee.
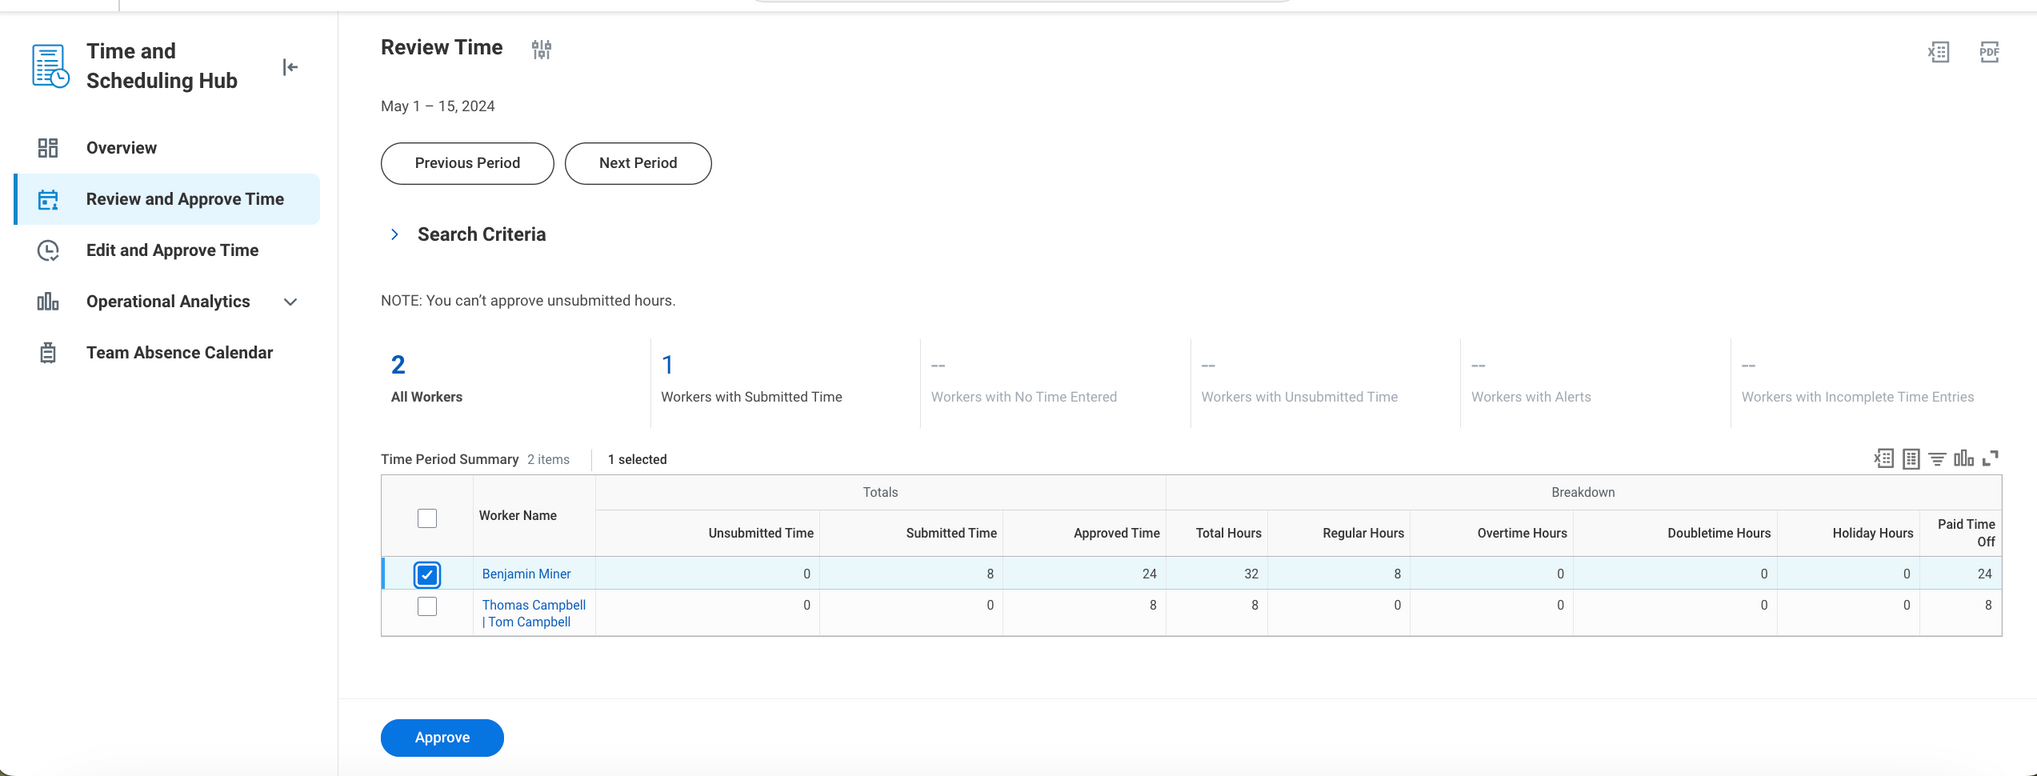
To approve from the “My Team Management” Dashboard click on the “My Team Management” dashboard from the home screen or from the menu. Then select the “Team Time and Absence” tab and click on the “Review Time” from the menu on the right-hand side of the screen.
You have two reports that can be used to view hourly employee time cards: the “Review and Approve Time” report and the “Edit and Approve” time report.
On the Review and Approve Time report:
- Do not change any filters, and click “OK”.
- Review the time period summary.
- Select which employees to approve and then click “Approve”.
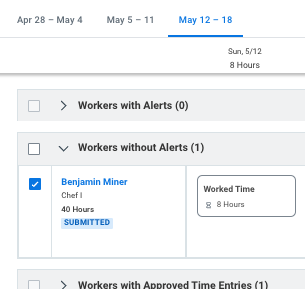
On the Edit and Approve Time report:
- Under the “View” filter, select “By Period Schedule” and then select “Semimonthly”.
- The report will summarize hours submitted for all hour employees on your team.
- You can review a specific employee’s hours by click on on their name.
- To approve hours for the entire pay period, select the employee to approve and then click “Approve”.
WHEN APPROVING TIMECARDS, DON’T FORGET THESE THINGS
- There is not a clock-in/clock-out feature for hourly employees. Employees can enter time as frequently as they would like (i.e. daily, weekly, or adding everything at the end of the pay period).
- Employees are encouraged to be as specific as you would like when entering their hours! See the conversion to see how minutes convert to decimals.
- Be sure to approve all absences through Workday so that they should up on employee timcards.
- If hourly employees work Young Life holiday, they get paid for 8 hours of holiday pay as well as their time worked.
- If a Young Life holiday falls on an hourly employee’s regularly scheduled day off, you still get paid 8 hours of holiday time.
Need help?
MOBILE APP LIBRARY
You can do any of the listed tasks in this handbook on your mobile app too! Click a link below to view a video on how to use the mobile app!
RESOURCES & HELP
Camping Services is here to help you learn Workday! Below are links to resources for you.
Learn new Workday Terms and see what terms they replaced.
View all user-guides, videos, and recordings of previous trainings.
Schedule time with Camping Services subject matter experts and view Camping Services Office hours. If you anticipate needing help surrounding important due dates, you can schedule time in advance!
CONTACT CAMPING SERVICES
Feel free to call us at 719-381-1903 or email us at ylcamping@sc.younglife.org